
|
Posting & Scheduling
|

|
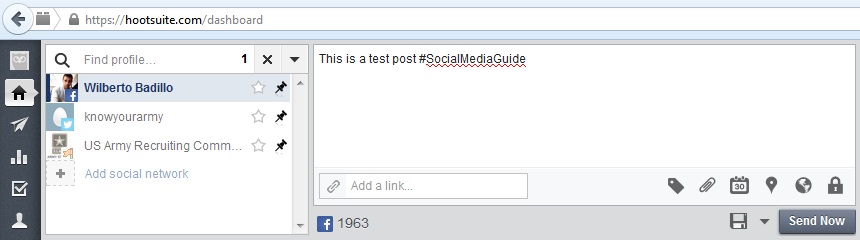
To create a post, look for the blank bar at the top of the Dashboard.
Once you click in it, you should get a screen like the one below. From here, you can craft your post in the text box. You can add a link, tag people, add a picture and even schedule a post. You can also post to more than one network at a time, just select from the list of accounts you manage, which should populate on the left side of the box. (Keep in mind that if you are going to post to different platforms, your post must still meet the posting requirements that each platform stipulates. ex Twitter 140 character post limit)
Once you click in it, you should get a screen like the one below. From here, you can craft your post in the text box. You can add a link, tag people, add a picture and even schedule a post. You can also post to more than one network at a time, just select from the list of accounts you manage, which should populate on the left side of the box. (Keep in mind that if you are going to post to different platforms, your post must still meet the posting requirements that each platform stipulates. ex Twitter 140 character post limit)
As mentioned before, you can schedule posts by using Hootsuite. Scheduling posts is probably one of Hootsuite’s most used features.
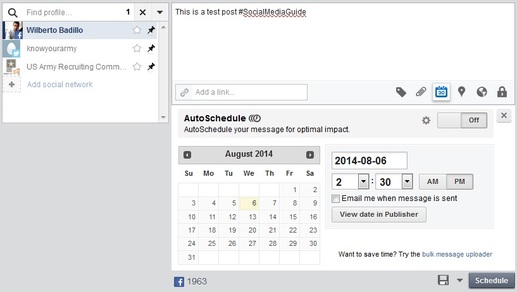
While it’s always best practice to manually post to social networks, using scheduling is helpful for posting updates outside of office hours, especially if you have fans and followers in different time zones.
To schedule posts, click on the calendar icon in the bottom right area of the box and set the date and time you want the post to go out.
Click schedule and you're done!
To schedule posts, click on the calendar icon in the bottom right area of the box and set the date and time you want the post to go out.
Click schedule and you're done!
